I am so thankful that I can see color. Most days I take for granted all the beautiful shades of colors I see. So when my children and I had fun with food coloring this week and my kitchen was filled with jars of water and color, I could not help but smile.

1. Ice Tunnels:
What you need: different plastic containers, water, salt, and food coloring.
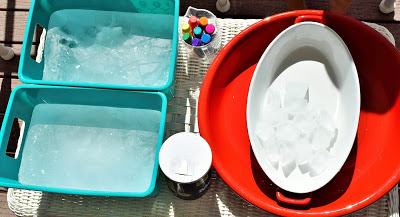
Put water in plastic containers and freeze. Once the water has frozen, dump the ice into a deep tray. Put salt on one ice block. Then add food coloring to it.
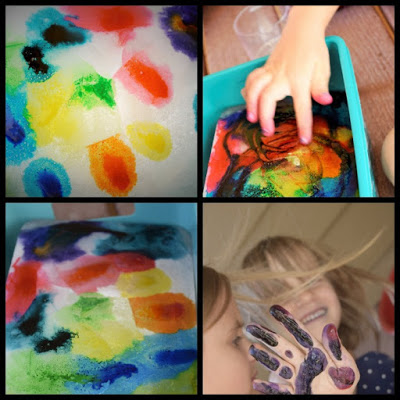
The above ice block has no salt on it.
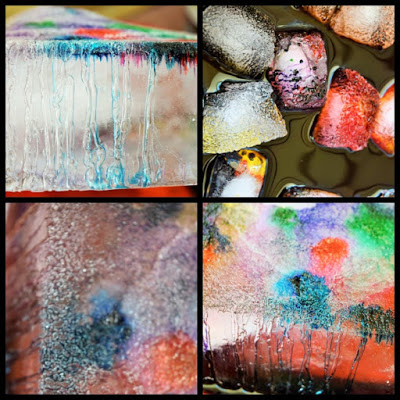
The above ice block has salt on it.
This science experiment shows that salt lowers the freezing point of water. The freezing point of water is 0 degrees Celsius / 32 degrees Fahrenheit. So the melting ice will actually be colder than it was before we added salt. When you add salt you will be able to see tunnels because the salt causes the ice to melt. That is why we put salt on icy roads to help roads from becoming icy and slippery. The salt makes tunnels. The ice block with salt was rough. The ice block without salt was slippery.
Here is a great website that explains the process : http://www.waynesthisandthat.com/saltice.html
2. Glass Jar Xylophone:
What you need: glass jars, food coloring, water, and wooden stick.
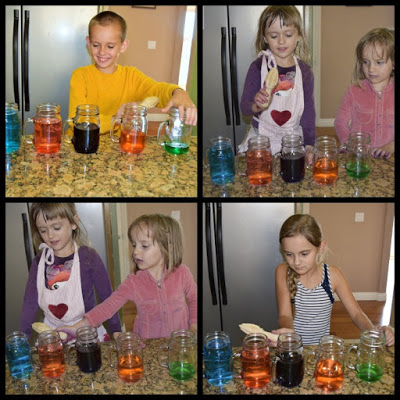
We first used a dry erase marker to help us to know how much water we needed to put into each glass jar. Then we dropped a different color into each glass jar and filled them with water.
This is a great way to introduce your children to science and music. This is perfect to show your children that when you leave different amounts of empty space at the top that it creates a range of notes when they tap out a tune with a wooden stick. The xylophone is an example of a percussion instrument so when we hit or strike a hallow instrument, sound waves bounce around inside and we hear sound.
3. Food Coloring Glue Art :
What you need: Glue, food coloring, tooth picks, and paper plate.
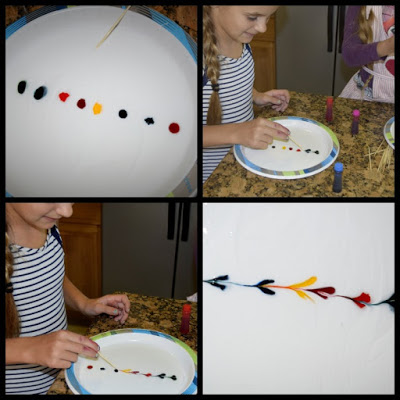
Esther made a beautiful line of hearts by first placing dots of food coloring on the glue. Then she used her tooth pick and moved it straight down the middle of the dots.
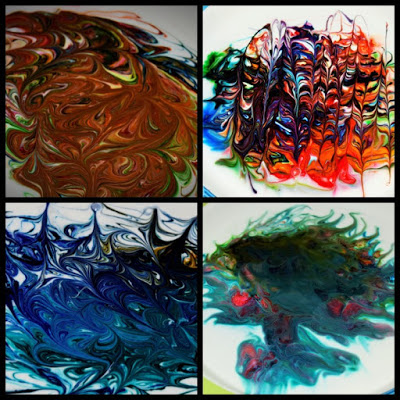
Place glue on paper plate. Add food coloring. Use toothpick to move and mix colors together. The art pieces turned out so beautifully.
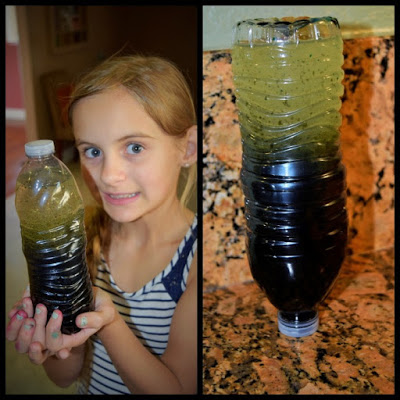
4. Water and Oil :
What you need: water bottle, oil, and food coloring.
First fill the jar half way full with water. Add some food coloring to the water. Then add oil to the rest of the water bottle. Mix and shake the closed bottle and observe.
So why does water and oil not mix? One of the reasons is density. The density of oil is less than water. Oil is lighter than water. So the water goes to the bottom because it is heavier. Another reason is because of polarity. Like dissolves like. Water is polar. Oil is non-polar.
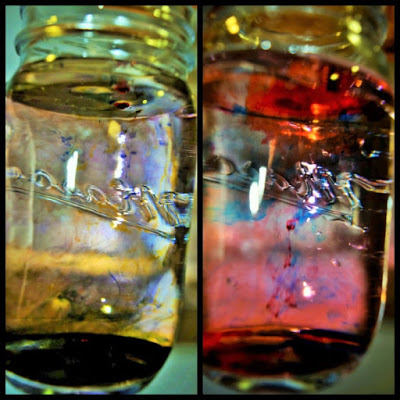
5. Water/Oil Fireworks:
What you need: water, oil, food coloring, and glass jar.
Fill the jar with water completely. Add a small amount of oil and food coloring into a cup. Mix oil and food coloring with a fork. Pour the oil inside the water jar. You will see that because food coloring is water soluble it will not dissolve in oil. It can only dissolve in water. When the oil and food coloring mixter is added to the water you will notice that the food coloring is trapped in oil but it will eventually sink into the water and dissolve.
6. Orange circles:
What you need: orange, food coloring, and toothpick.

Cut the orange in slices. Add food coloring and use toothpicks to mix the food coloring.
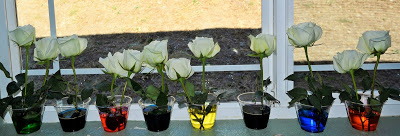
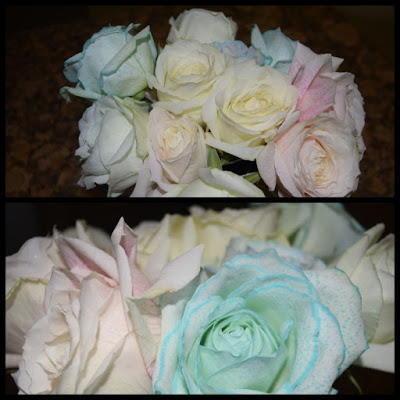
7. Food Coloring Roses:
What you need: roses, food coloring, and cups.
This is perfect for little ones to watch because they can see that plants need to drink water just like us.
8. Food coloring Lettuce:
What you need: lettuce, cups, water, and food coloring.
9. Dyed Cotton Balls:
What you need: cotton balls, water, cups, plates, and food coloring.
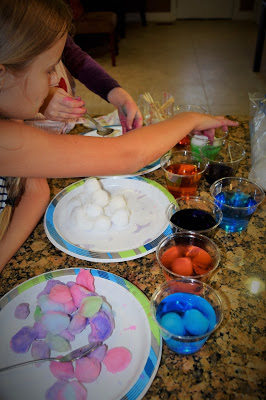
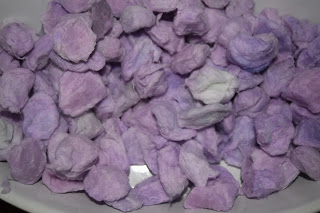
This is a great way to explain to children that dyes are used to dye our clothes. Our clothes first start out as white and then they are dyed many different colors.
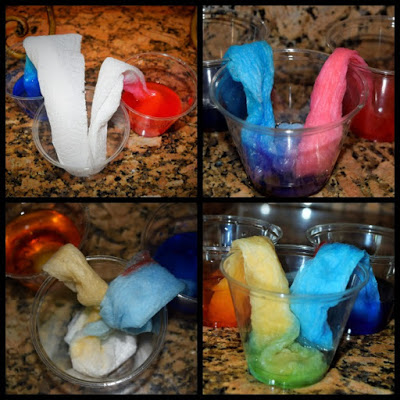
10. Walking Water :
What you need: cups, water, food coloring, and paper towels.
Kid Minds
I love it, Irina! Great minds think alike! We have spent the last two months studying Colors too! I was so inspired by reading of the book called Color: a natural history that I hasn't been able to stop ever since. Just like you, I'm so thankful that I can see colors! And I'm thankful that there are so many beautiful colors in my daily life! We did a lot of similar things like ice and flowers, but somethings you did we didn't do. I want to try your Walking Water and Orange Circles! Thank you so much for sharing your inspiration!!! Blessings!
Diona Navarro
Great ideas! I bought food coloring a few months ago to do the walking water and haven't even opened it yet. I am determined to do at least two of these this week. They look like fun and I know my kids will love them. Thank you for sharing!!
Diona@AllDayEverydayMom
Antonia Smith
these are great ideas!!!! Saving them to use! The first one I plan to use is the coloring roses!!!