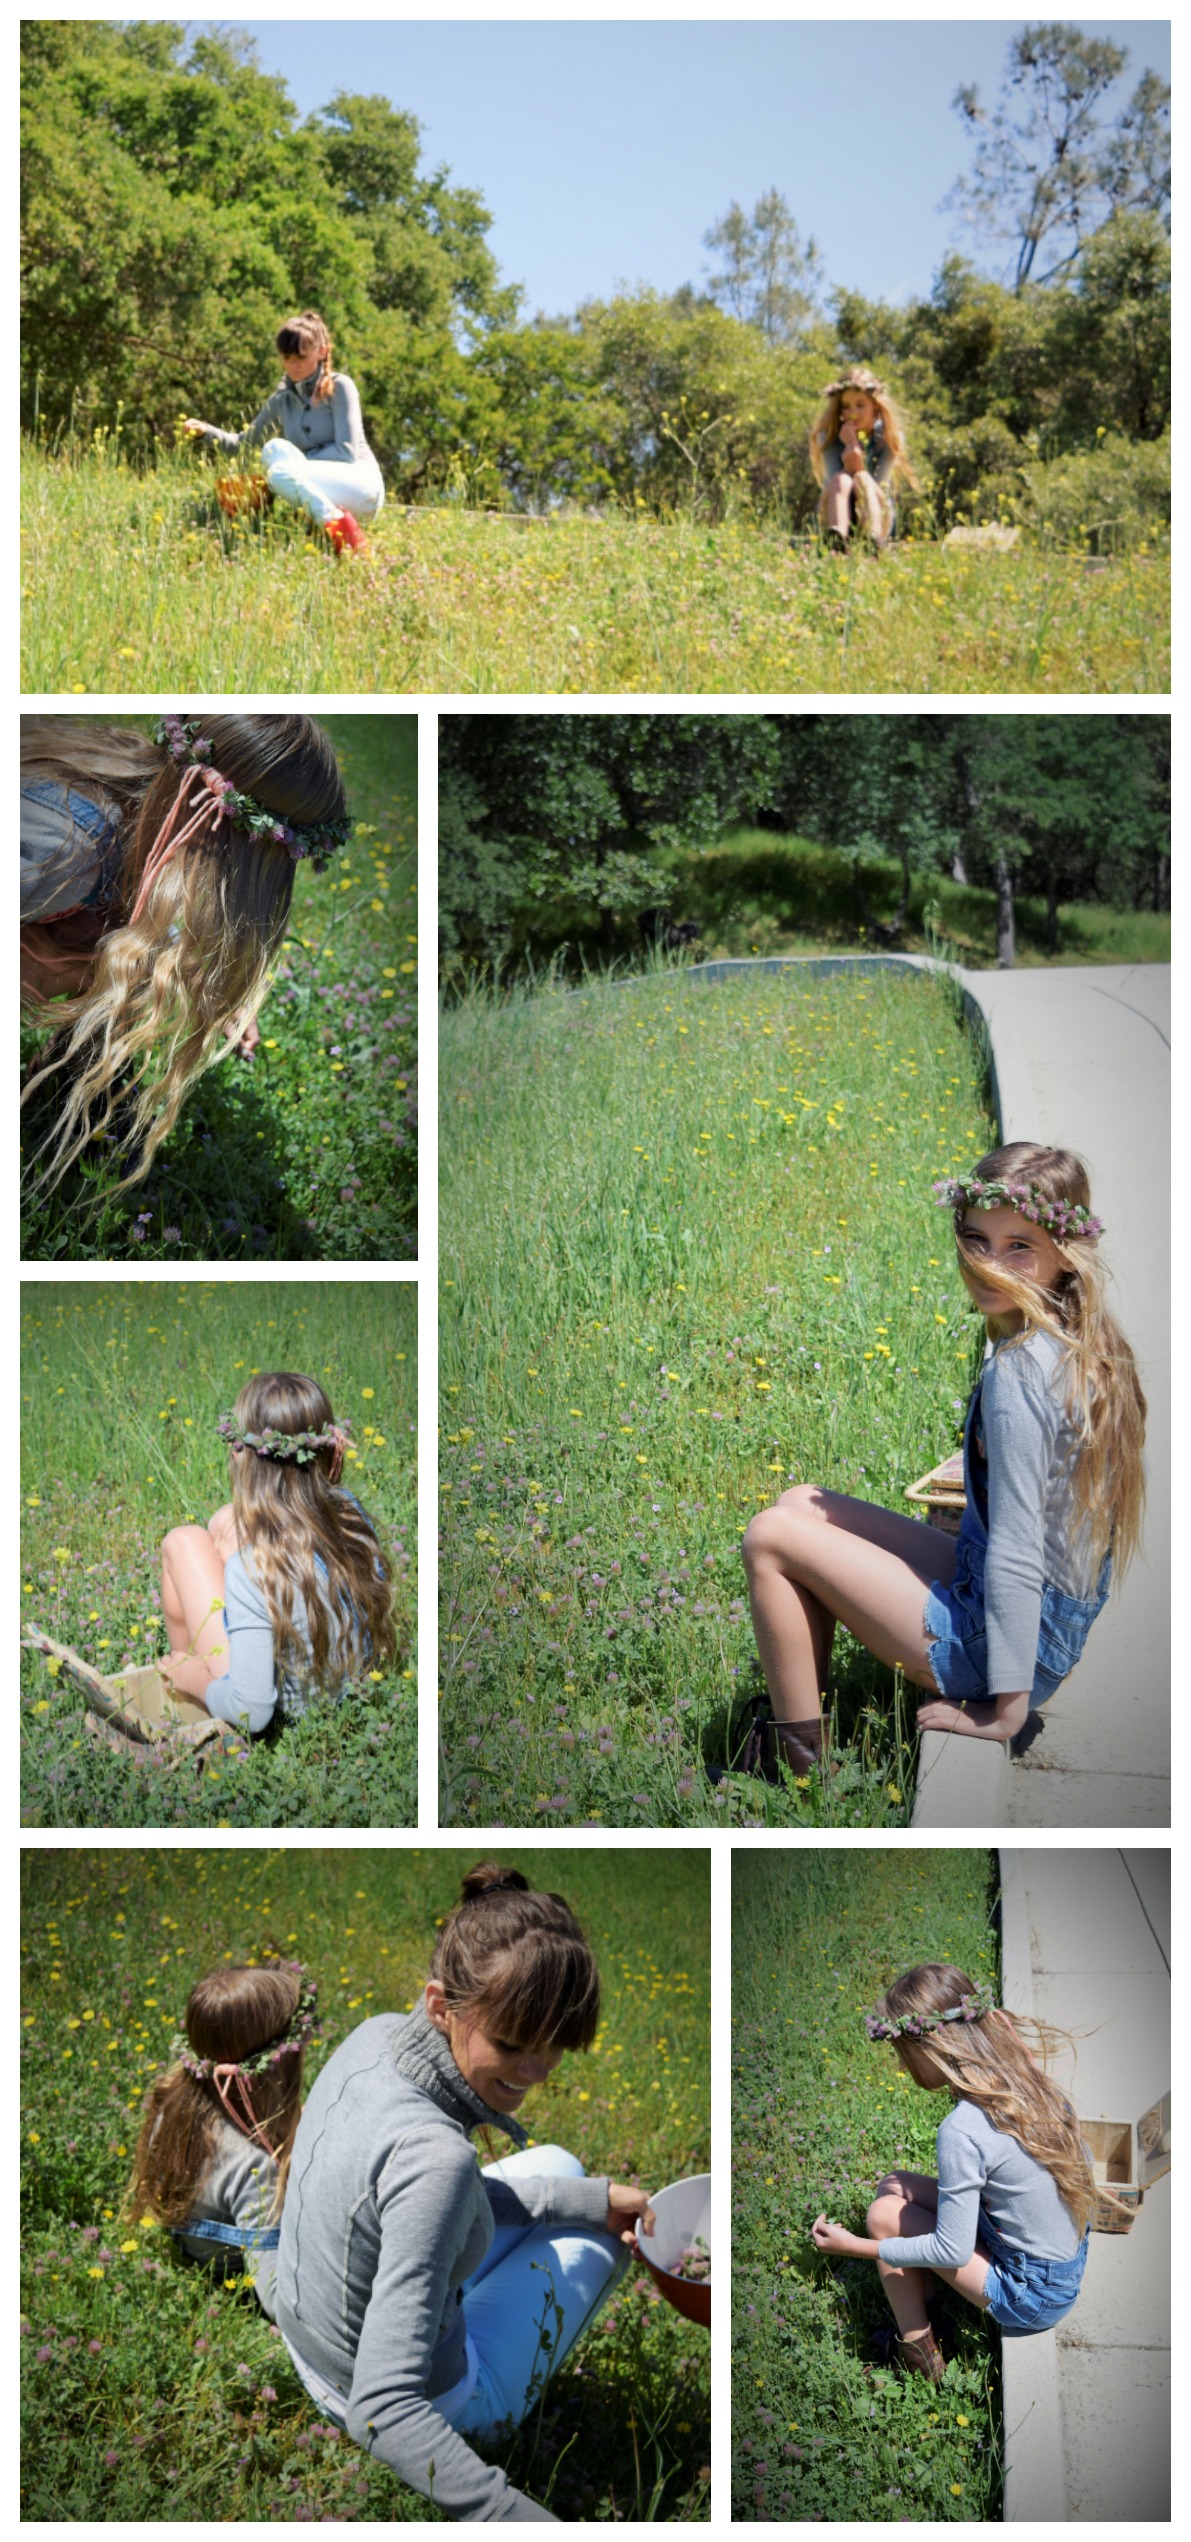
As I was taking a walk with my children last week I could not help but notice the ground in our yard was covered with red clover blossoms. I got extremely excited and had my kiddos help me pick these beautiful edible wild herbs. We kept picking and drying them for the next following days in our drying rack.
Did you know that red clovers are part of the pea family? It is said that red clovers are a symbol of the Trinity for Christians.
The Russians have used red clover for asthma while the Chinese have used red clover for coughs. The Native Americans used red clover to help with sore eyes, burns, and as food. Red clover helps relieve women from cramping during menstrual period and is known as a liver and blood purifier.
Some say it is not advised to take red clover if you are pregnant or on some sort of blood thinning medication. I am not a professional, just a mom trying to learn and teach my children about wild herbs so please ask your doctor before trying anything new. Also, remember moderation is key when trying something new.
One of the reasons that we dried so many red clovers is so that we can enjoy the red clover in moderation over time.
You want to pick the red clovers when the petals are still pink or red in color. You could also use the first three leaves attached to the blossoms.

Red Clover Salve
Red clover is perfect for eczema, acne, rashes, and more. Red clover is an anti-inflammatory so great for reducing redness.
What you need:
Red clovers
Oil: any choice
Mason jars
Beeswax
Cheese cloth
You need to make sure you have 1:5 ratio. So 1 pound beeswax to 5 pounds oil.
Place oil into pot and cover the oil with dried red clovers. You want to have your stove on very low heat for about 6 to 7 hours.
Place your cheese cloth on top of a new bowl. Pour your oil and red clover mixture. Drain all of the oil. Discard the red clover.
Get a small pot and place hot water in it. When the pot has come to a boil place the metal bowl on top of the pot. Add in small portions beeswax. Use a fork to determine when your salve is ready by placing it in the oil and beeswax mixture. If the fork dries whitish and feels soft when dries then you are done. You do not want to add to much beeswax because it will not be as smooth. If you do add too much beeswax then you will need to add more oil to make it softer.
Do not let it cool. Place your salve in a mason jar as soon as you can. You will know when it has dried because it will change colors and will harden a bit.
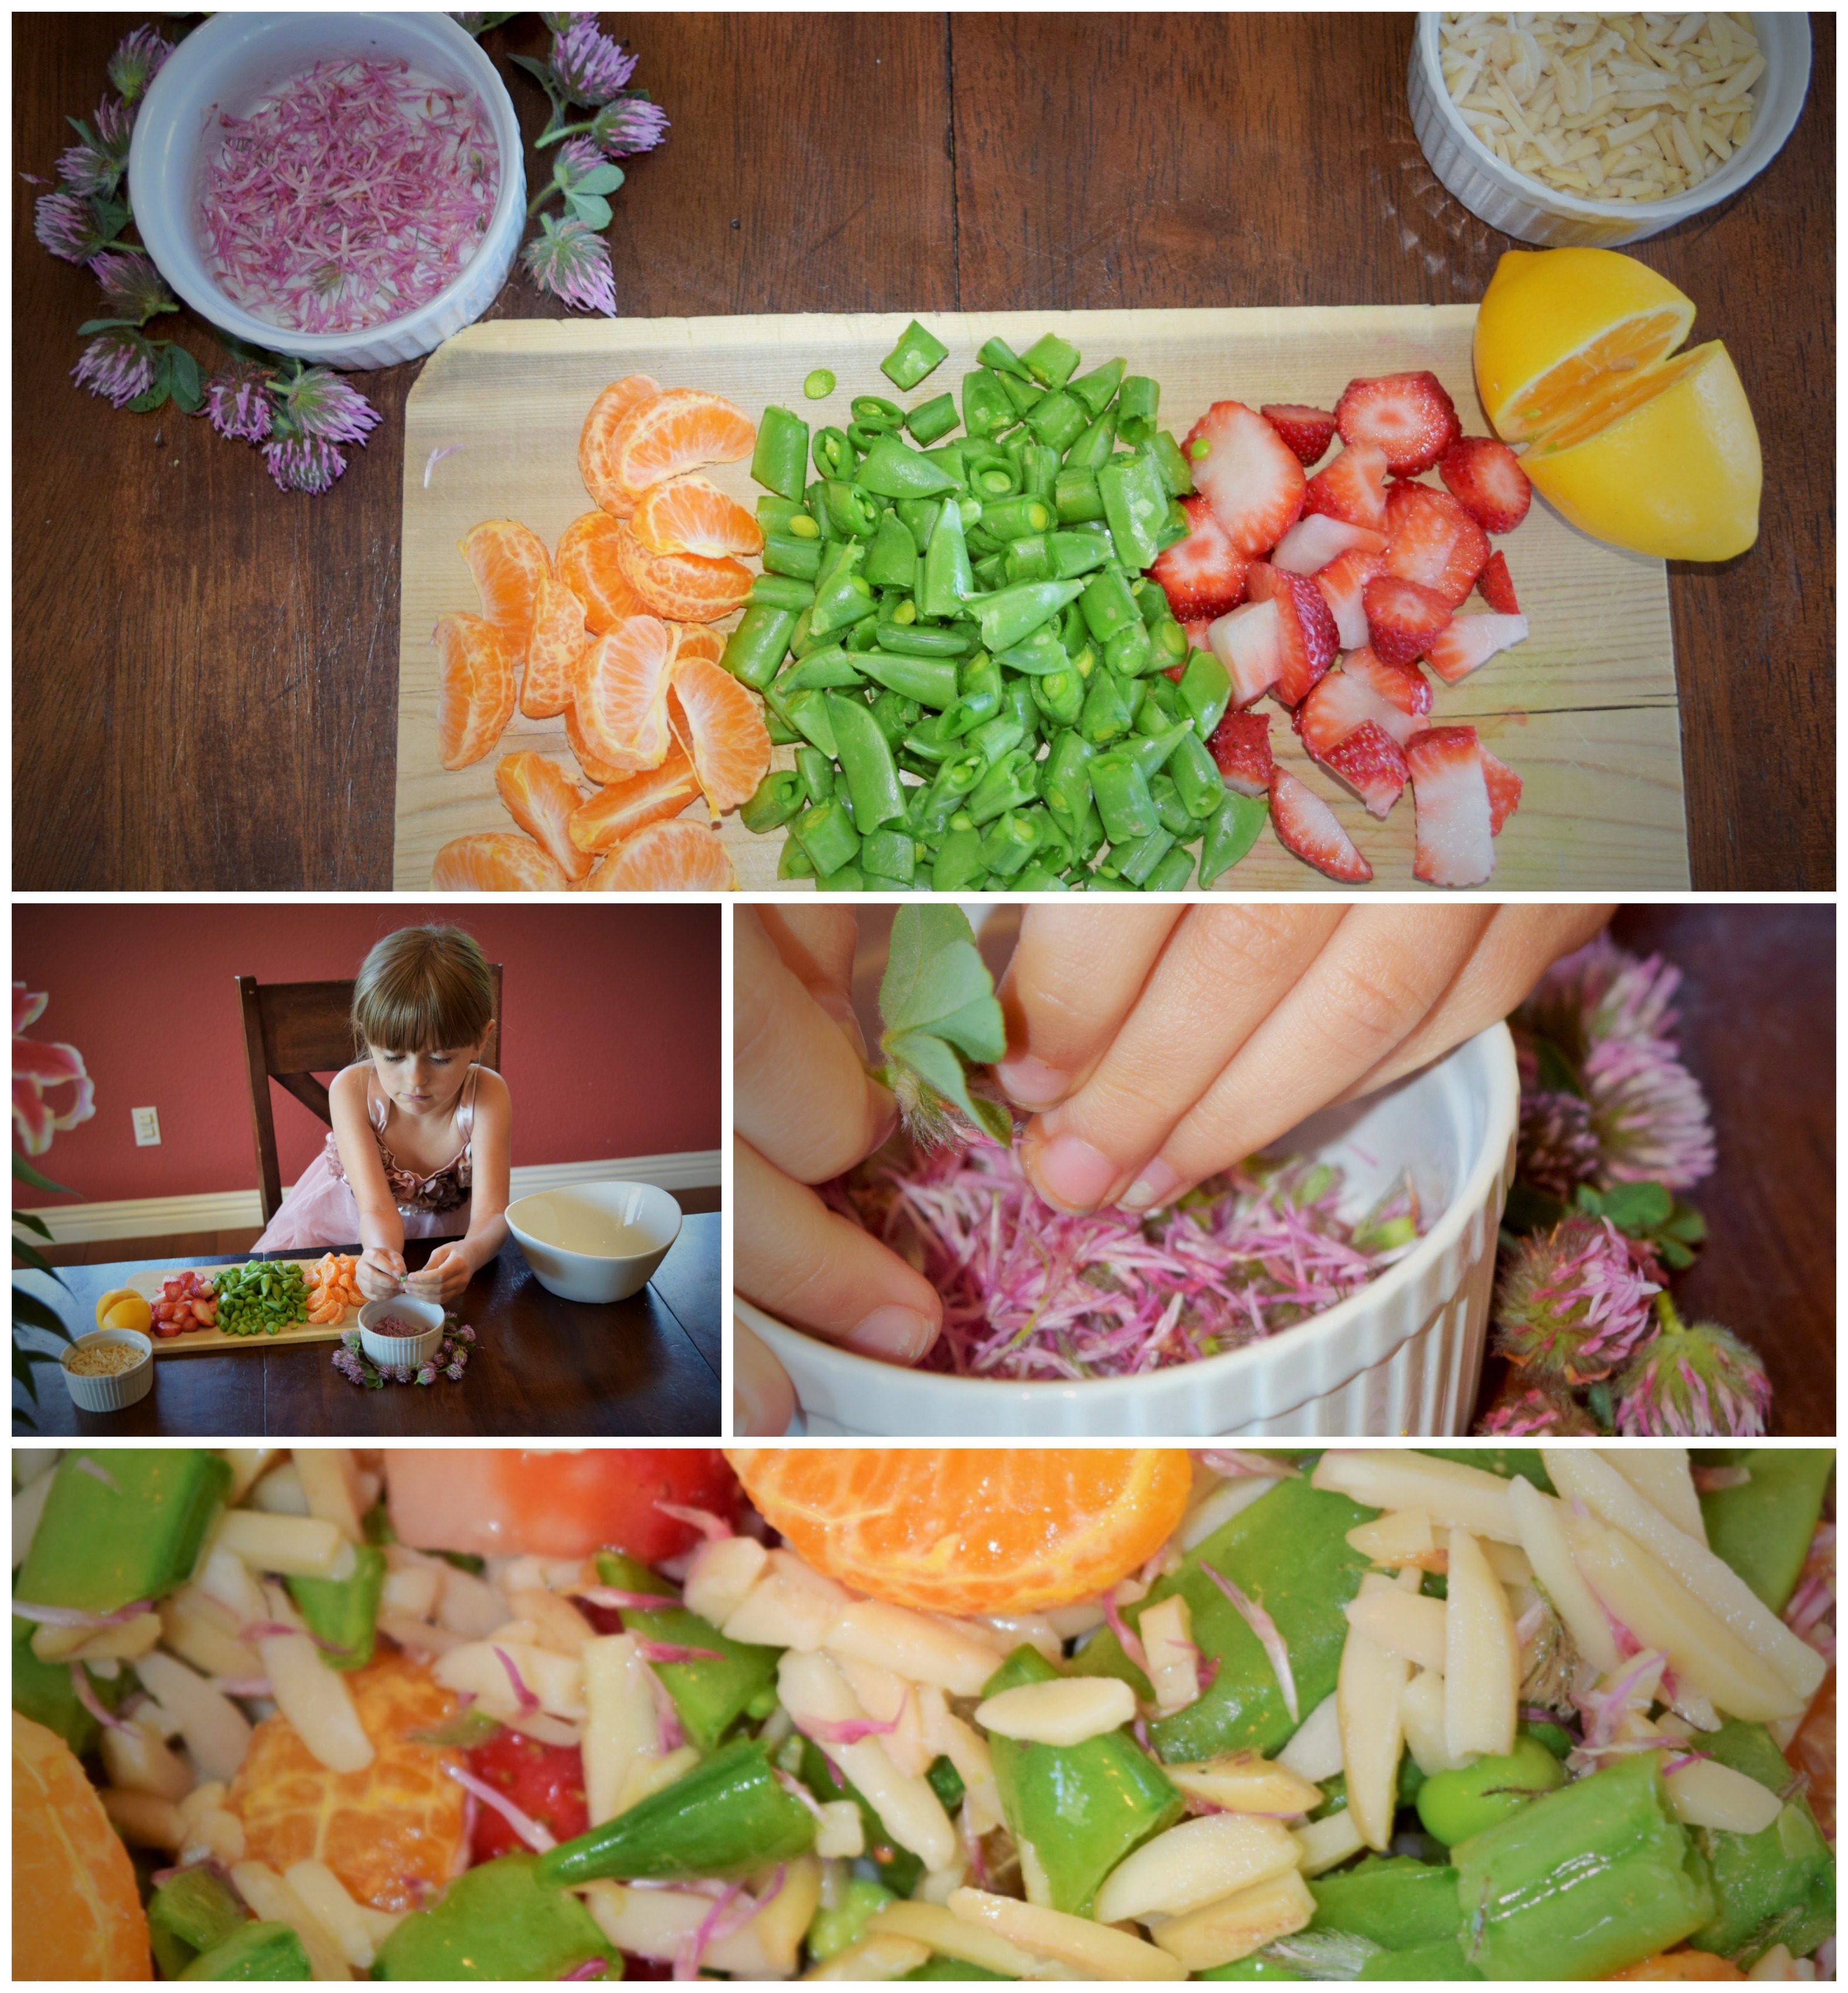
Red clover salad:
I am a strong believer that one can not go wrong when making a salad so get creative with different vegetables, fruits, and nuts to figure out what combinations you like. We love to add fruits in our salads.
What you need:
2 cups of young snap peas ( chopped up in smaller pieces)
1 cup of strawberry
1 cup of orange
1 cup of chopped nuts (your choice)
1/2 lemon juice
1/2 of red clover petals
Mix all of the above ingredients together and enjoy.
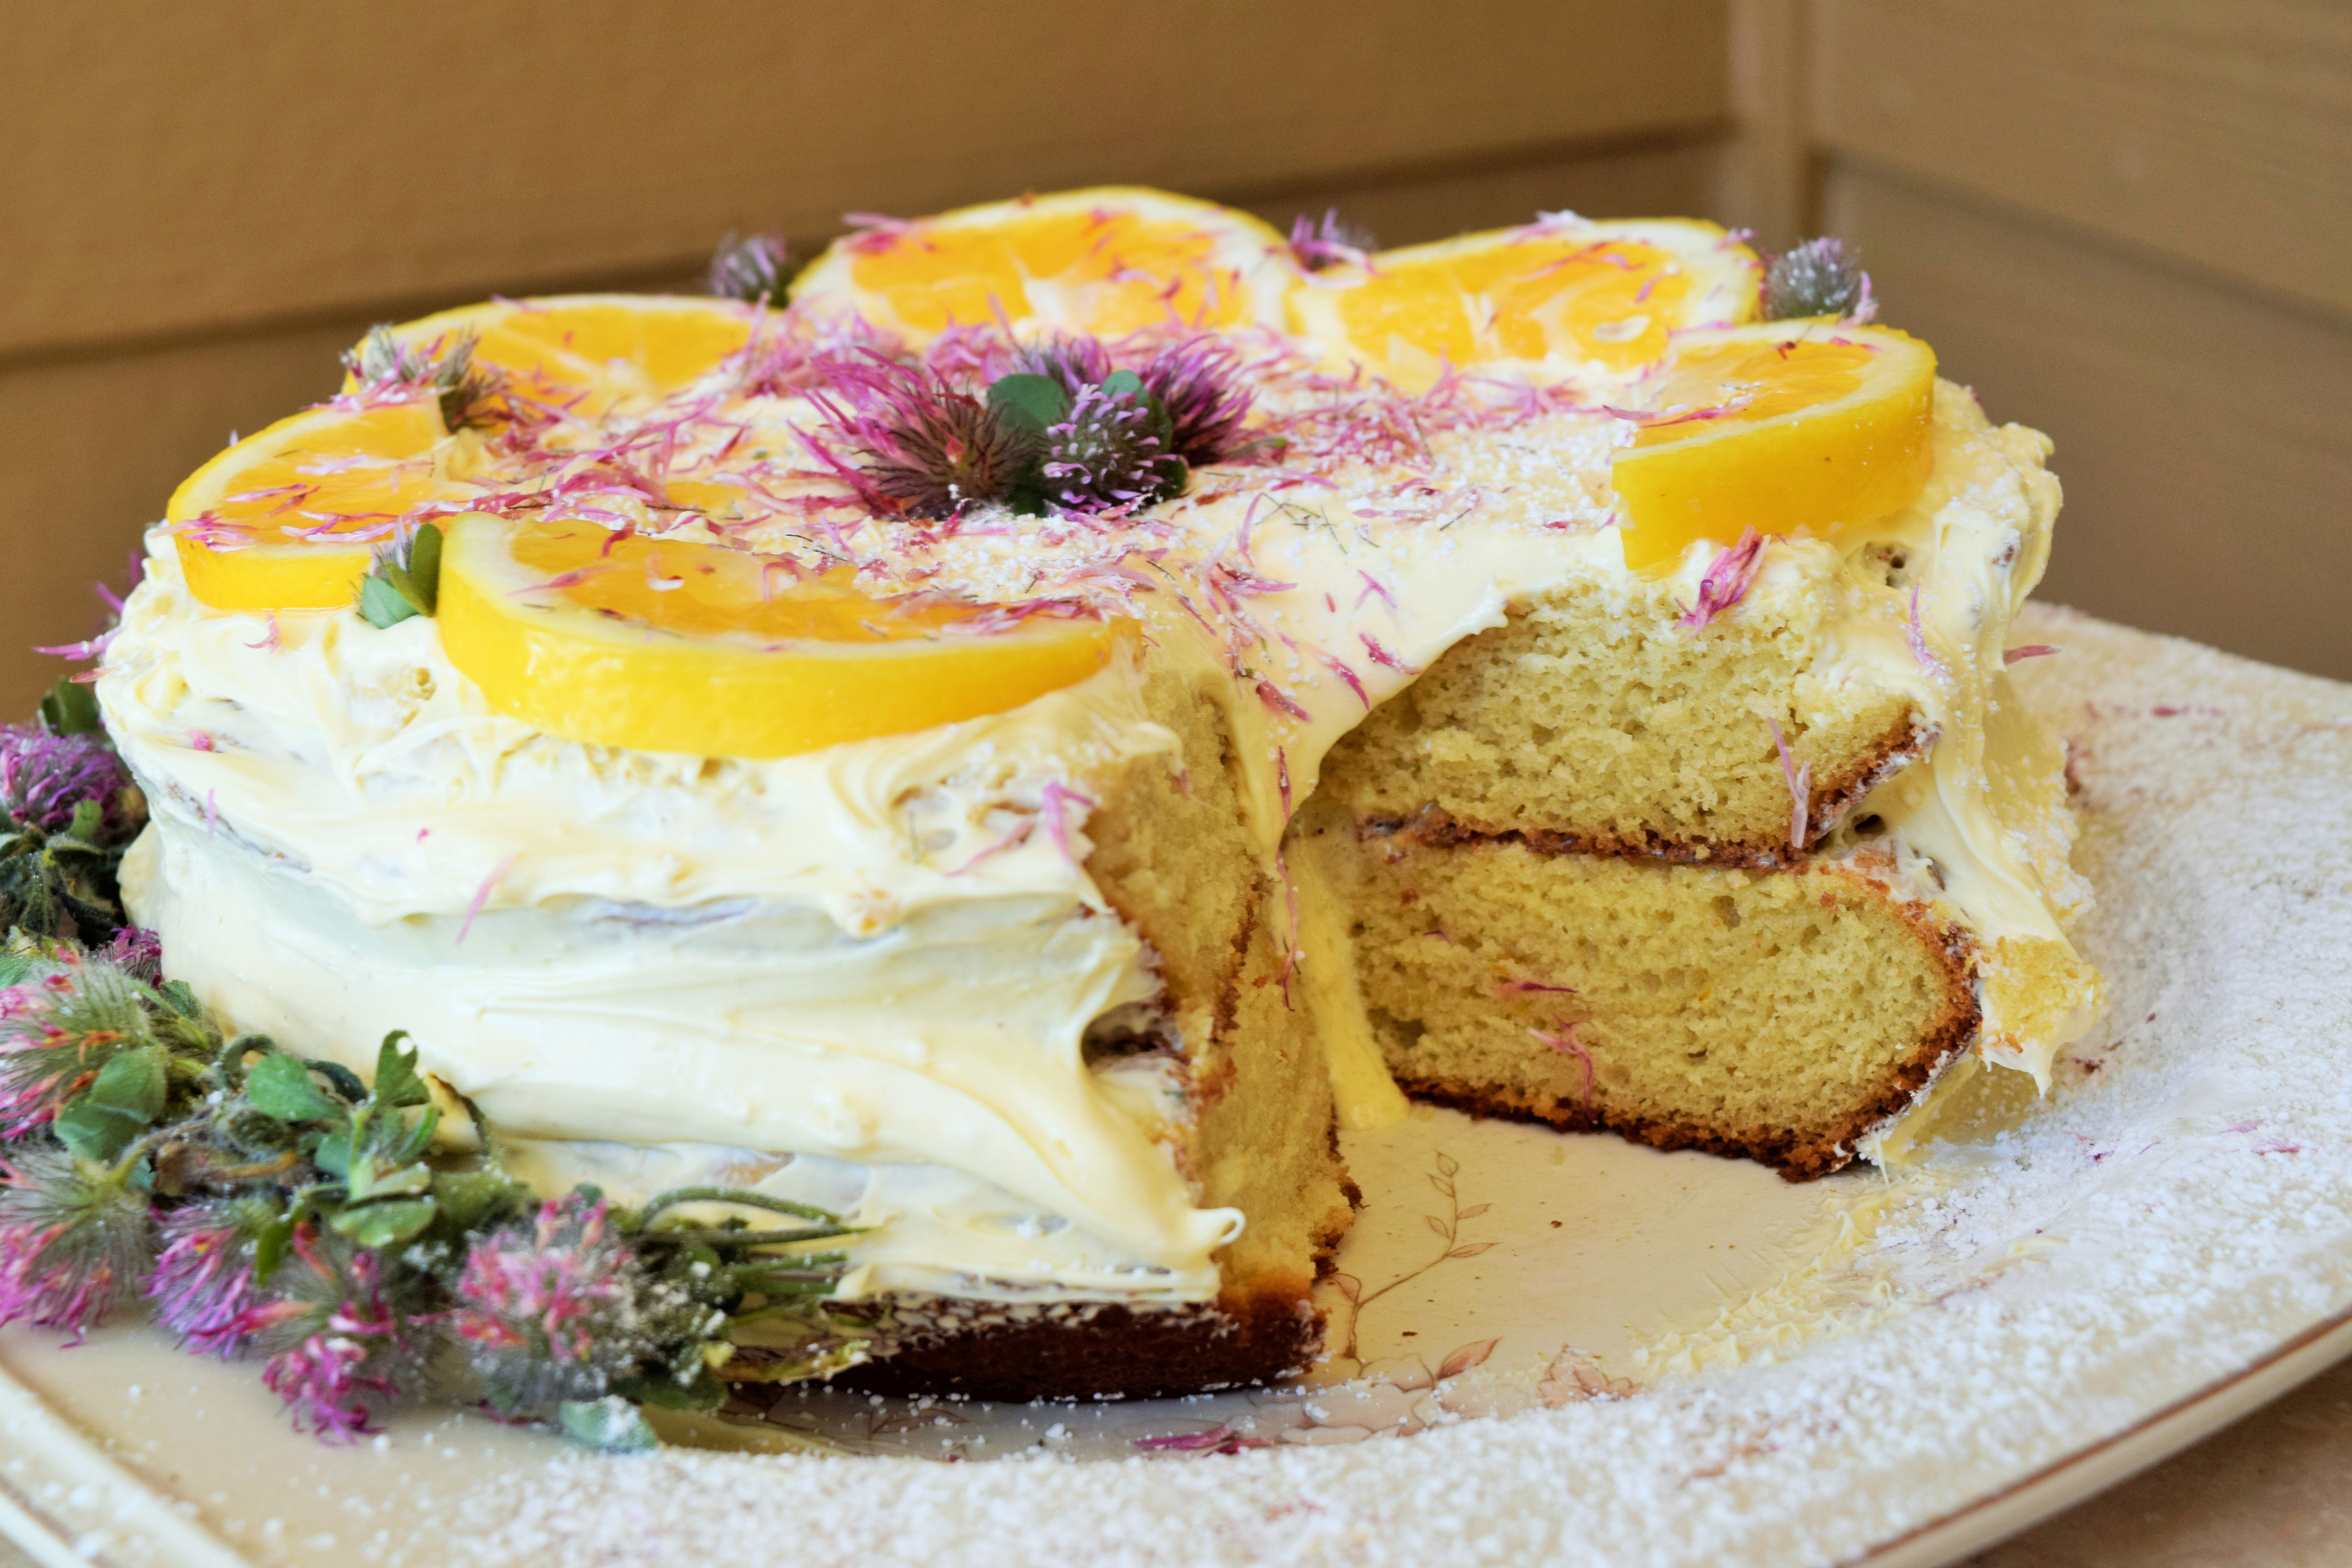
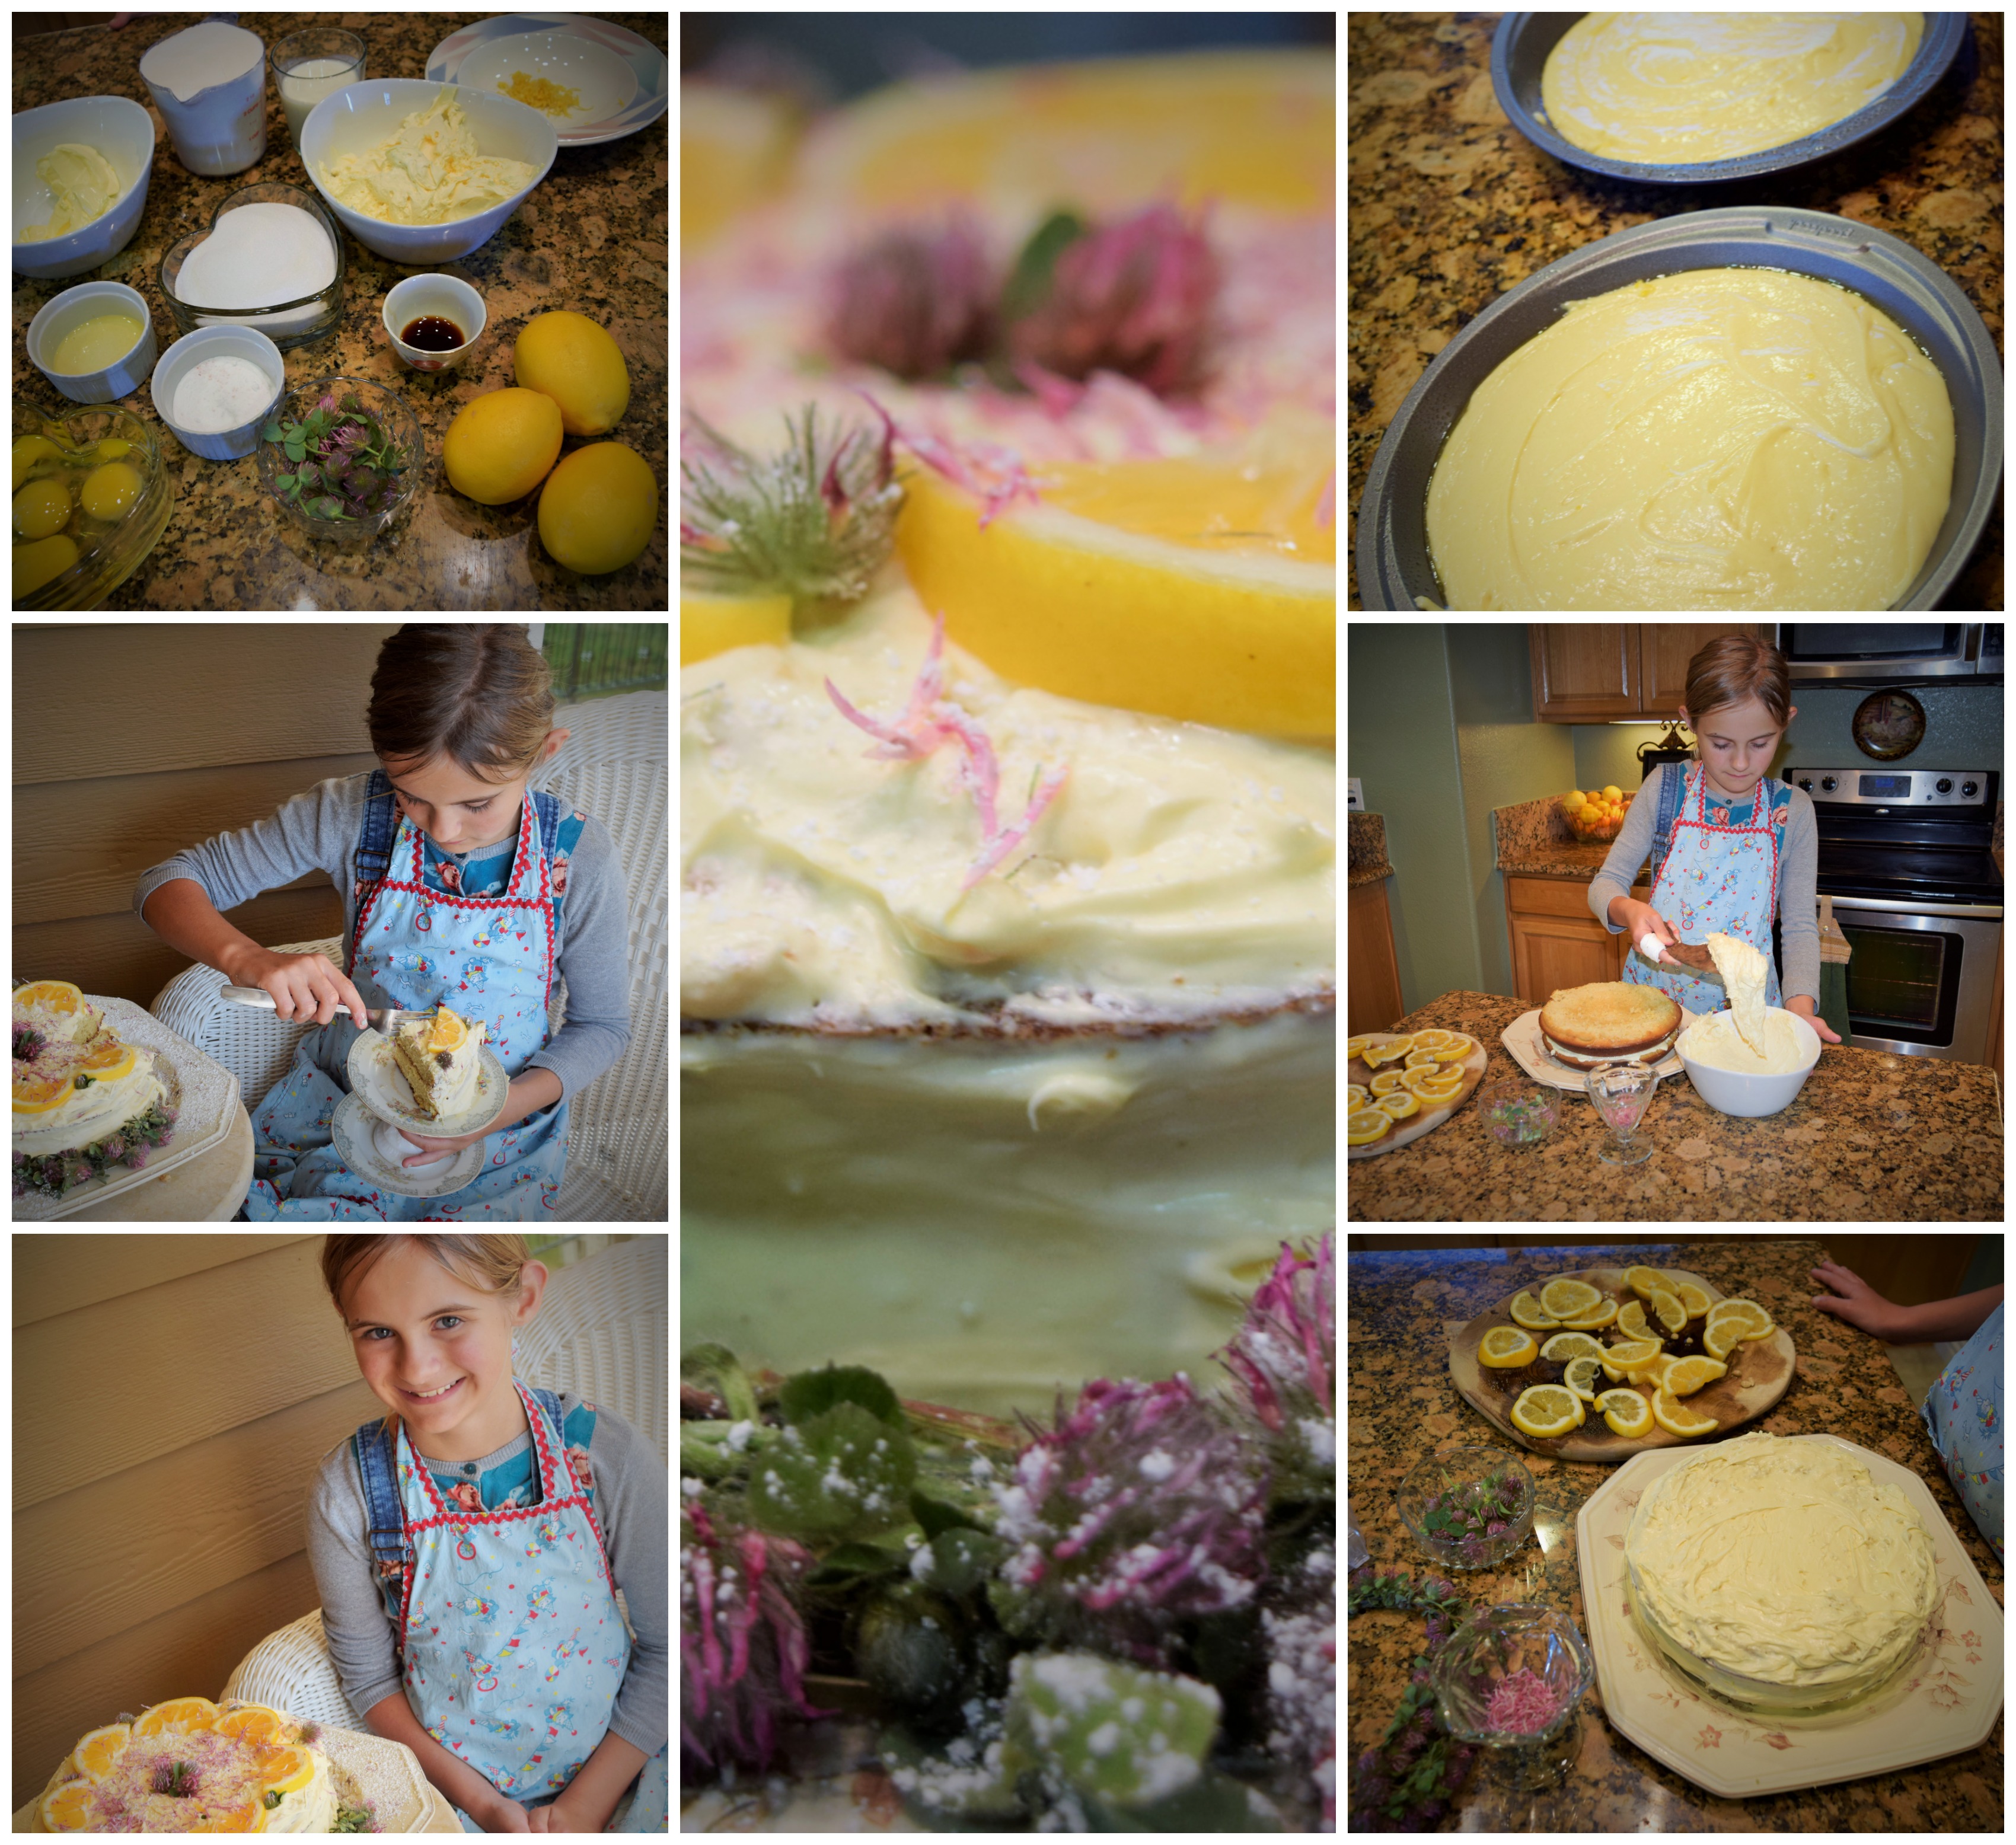
Red Clover Lemon Cake:
Who doesn’t love a great tasting lemon cake? Esther added some red clover flowers to the top of this beautiful cake.
What you need:
1 cup of butter (room temperature)
3 lemons for lemon juice (next time she is planning on using 4 or 5 because we like our lemon cake to be a tad bit more lemony)
3 cups of flour
2 cups of sugar
1 tablespoon of baking soda
1/2 tablespoon of salt
4 eggs
Lemon zest
1 cup of butter milk
You want to add all the dry ingredients together (except for sugar) in a separate bowl and place aside. Add soft butter and sugar to a new bowl and whisk together. Place one egg at a time into the sugar and butter bowl. Mix well. Add vanilla extract. Then add the lemon zest and the lemon juice into the butter mixture. Add 1/2 of the dried ingredients into the butter mixture. Mix well. Add 1/2 of the buttermilk into the butter mixture. Next add the rest of the dried mixture and the butter milk and mix everything together very well. Place batter into two 9 inch pans. Remember to place oil on your pan before you add batter. Turn oven on 300 F for 25-30 minutes. Let your cake mix cool off on a rack for a few minutes.
Add butter frosting to the top of the first cake layer and then place second cake layer on top of the first layer. Cover your cake with butter frosting. Place your cake in the fridge for 10-15 minutes so it would be easier to decorate your cake. Decorate the cake with lemon slices, red clover flowers, and red clover petals. Enjoy.
You can add red clover petals to any dessert you would like.
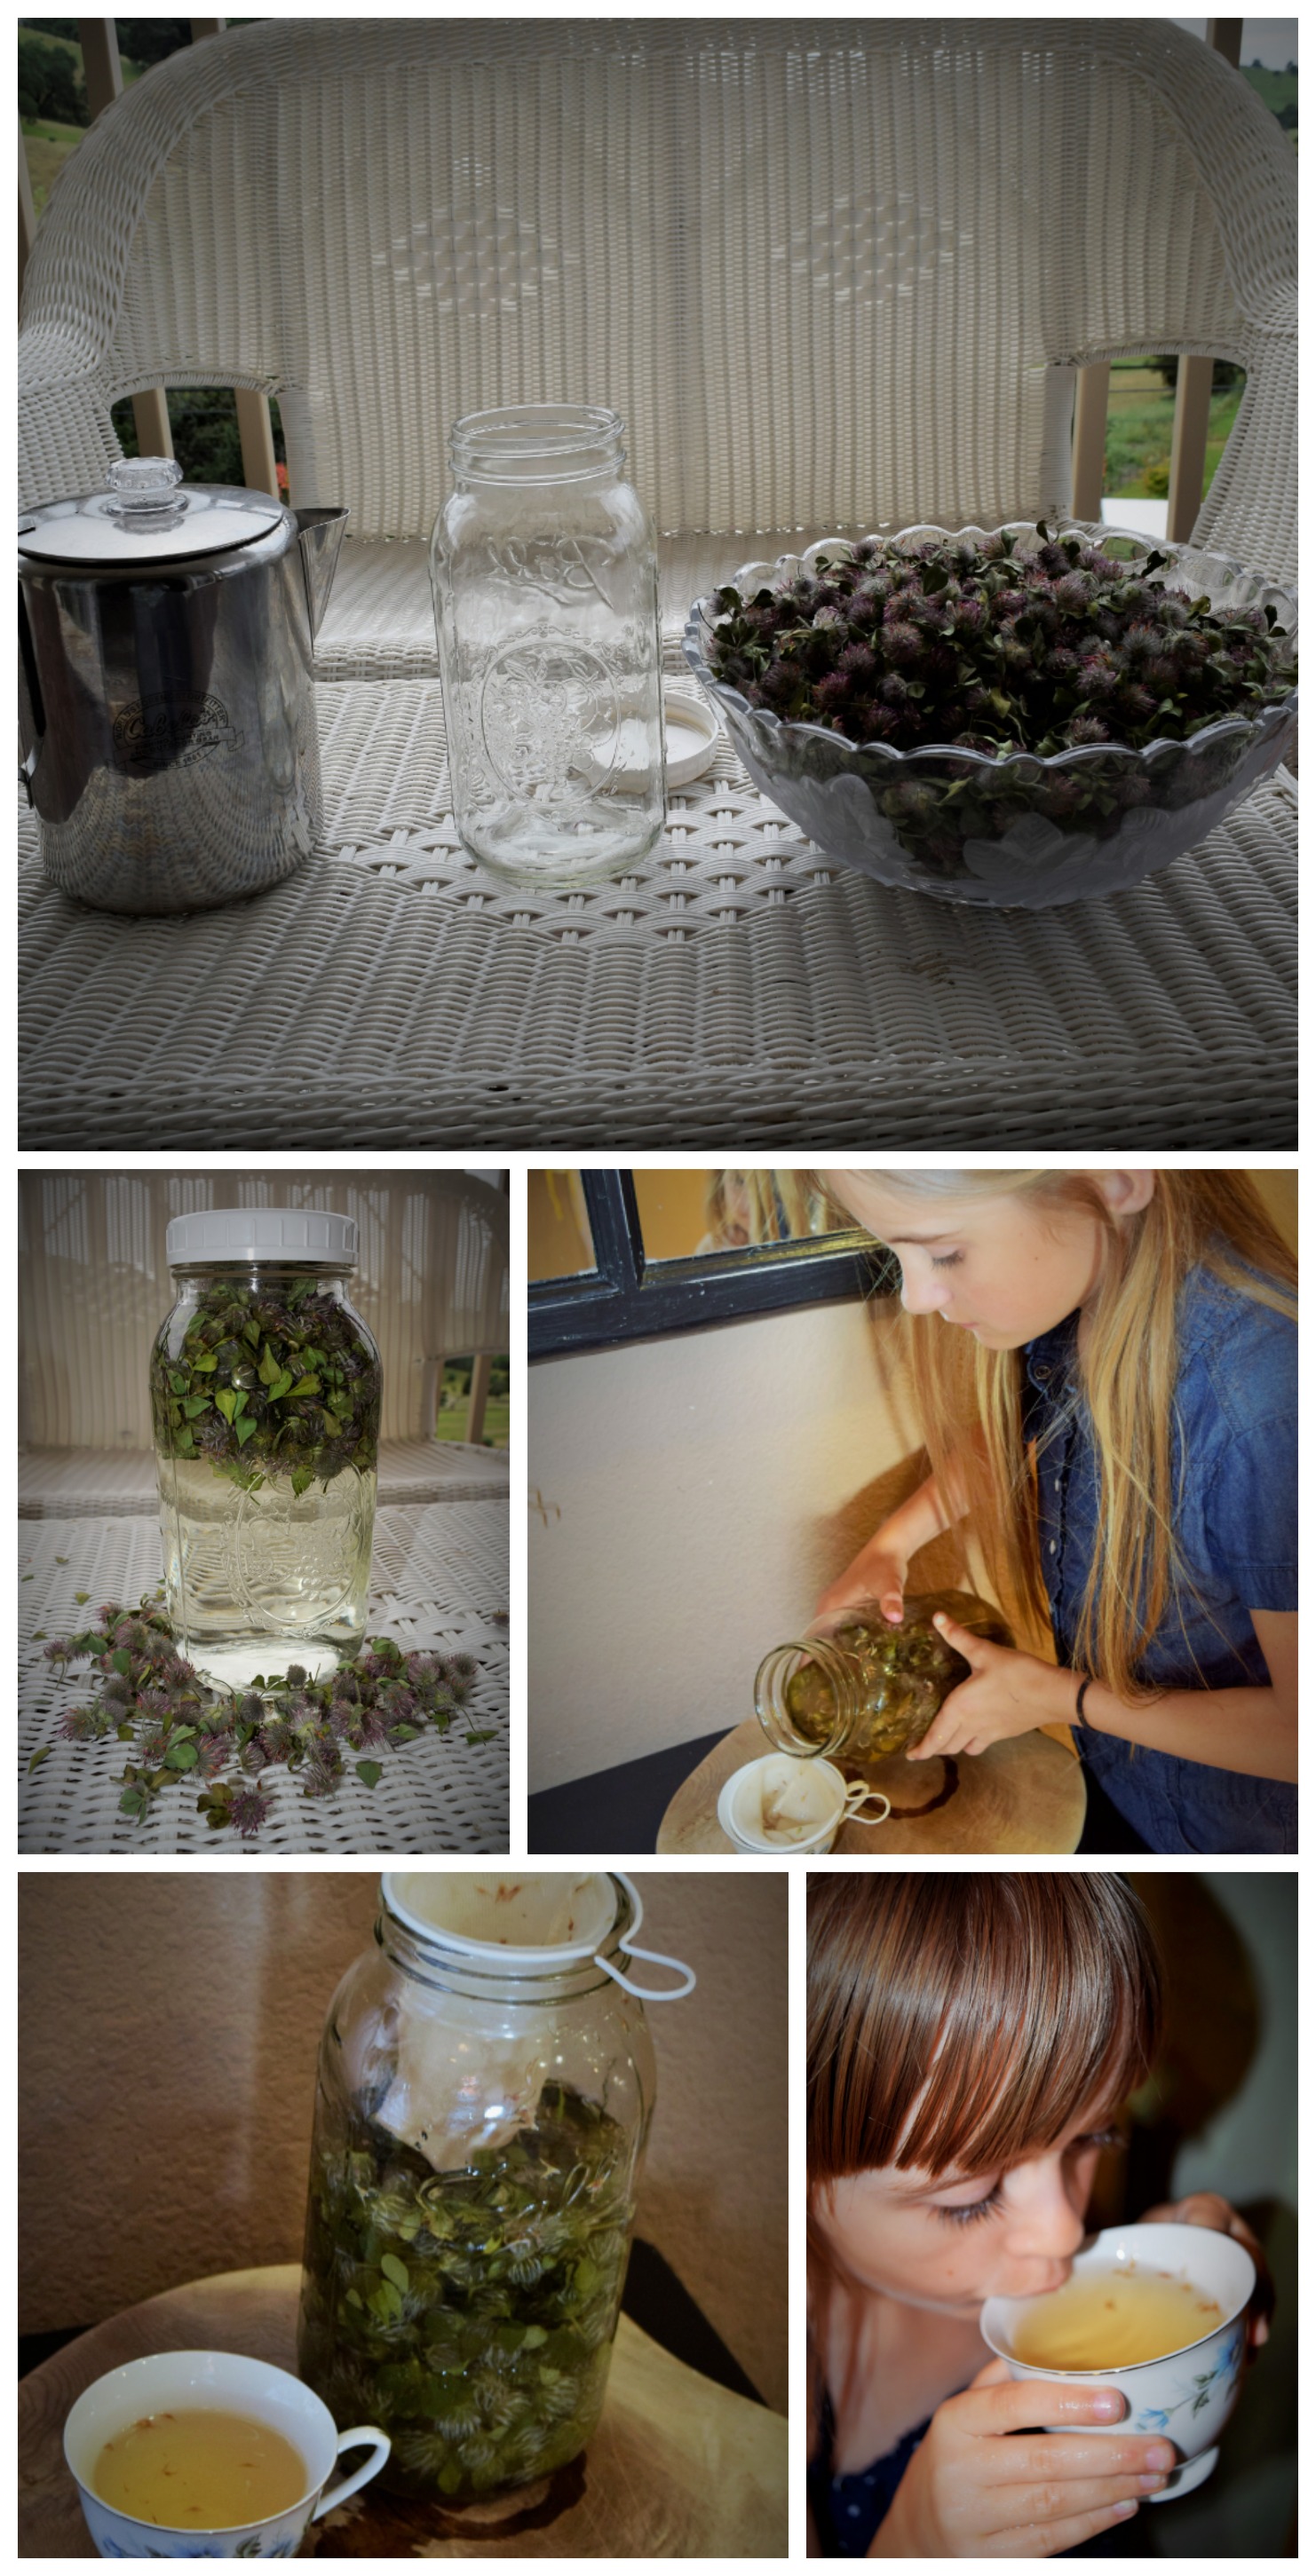
Red Clover Infusion:
We love tea but infusions are even better because you give more time for the edible herb to release all its goodness before you drink it. What you need is 4 cups of red clover, 8 cups of boiling water, and an 8 cup glass container. Place red clovers inside the glass jar and cover the jar to the top with boiling hot water. Let this sit on the counter for four hours. Then drink your tea throughout the day.
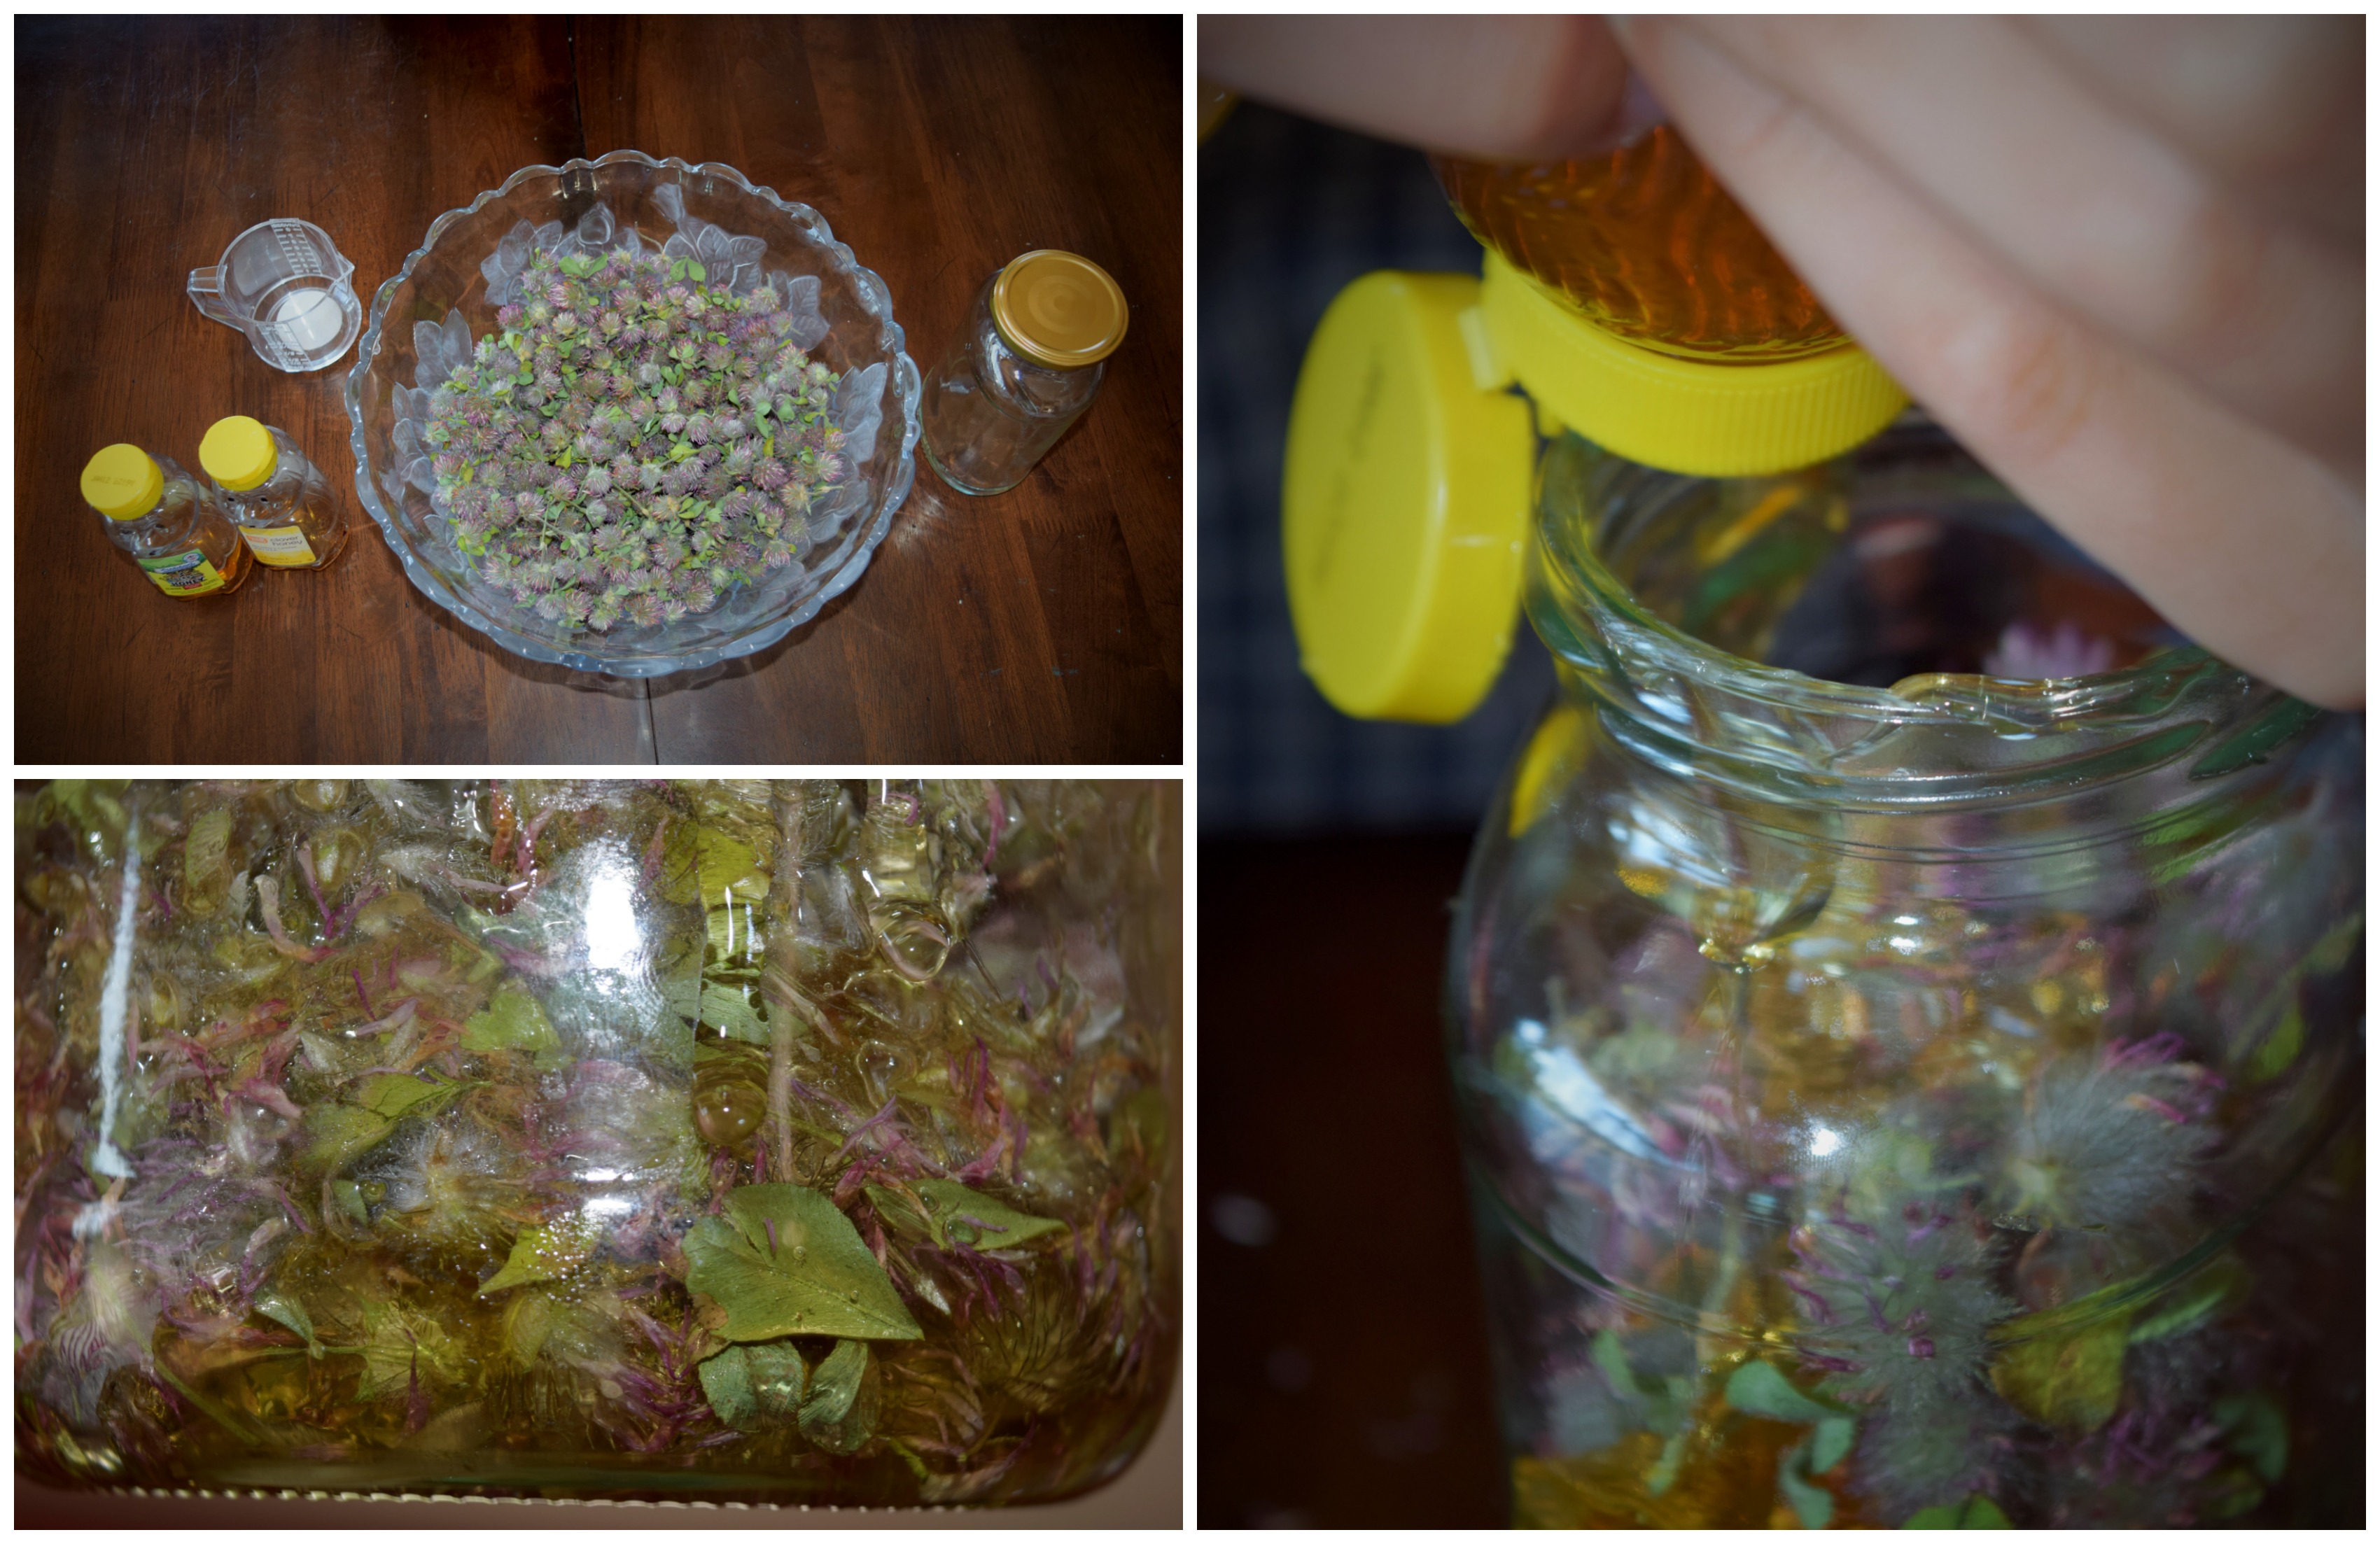
Red clover and honey jam:
You want to use dry red clovers when making your jam. Place as much red clover as you would like and fill up the jar with honey. Mix well once a day for 3 days. We used the whole blossoms and the first few leaves when making this but I would recommend only using the pink petals because it is much taster and softer this way.
Laura
What a beautiful activity with your children! Very inspiring to see how you used red clover flowers in multiple ways. I am sure your children cherish these special family memories that you are making with them! 🙂 I love the idea of making the salve from red clover. I think it’s so important to use what we can to make things instead of always buying things from the store. Do you have any books that you use to inspire you to create salves and other natural products? Great post!!
Homegrown Adventures
Laura…. Thank you love. No I have no books. This was our very first natural product that we made and we were so surprised at how easy it is to make our own salve. We now want to make many more natural products so we will be looking for books. We probably will go to the library first to see what we would be interested in learning. 🙂
Shann Eva
That cake looks amazing! So cool how many different things you were able to make with the red clover. I didn’t know much about it, but I’m so glad you shared all the benefits of using it.
Christine - The Choosy Mommy
What a great learning experience for your kids. I always like hands-on learning better than book learning. And your lemon cake looks delish!!
Rachel
Wow, so many great ideas! I wish I could follow along on your adventures! I guess reading about them is the next best thing. Great to see you link up at the Family Joys Linky Party!
Healing Mama
Your kids are so cute! Your daughter Esther is a natural in the kitchen! I think it’s wonderful that she knows who to bake/cook at such a young age. I hope I can teach my daughter to bake/cook when she gets older. I also loved your son’s tea infusion segment! I didn’t know that red clover had such great healing benefits!
Ana
I loved your posts and the creative ideas by which you engage your kids. At such a young age, your kids are very talented. Thanks for sharing all the recipes and awesome videos of your kids!
Have a great week ahead!
Psychic Nest
Your kids are so adorable and I love how you gathered red clovers together! Thank you for the recipes, everything looks delicious! I enjoyed the videos and the post, great job!
Zaria